
By: Nolan Lawson
Published: 28 April 2016
By: Nolan Lawson
Published: 28 April 2016
A common scenario when writing an app is that you have some data in a database, and you want it to be immediately available when the app starts up. Your users might be able to modify the data once it's loaded, but either way, they should be able to quickly start from a predetermined state.
PouchDB offers two ways to do this:
In this tutorial, I'll give step-by-step instructions for both techniques.
Note: this method only works for hybrid apps, i.e. apps built with tools like Cordova, PhoneGap, and Ionic.
The advantage of bundling a SQLite file with your app is that the database is instantly available. There's no need to process any data to convert it to a usable format; the SQLite file is already ready for PouchDB to use.
To start, we'll need some data. Let's say I have a CouchDB or a PouchDB Server that looks like this:
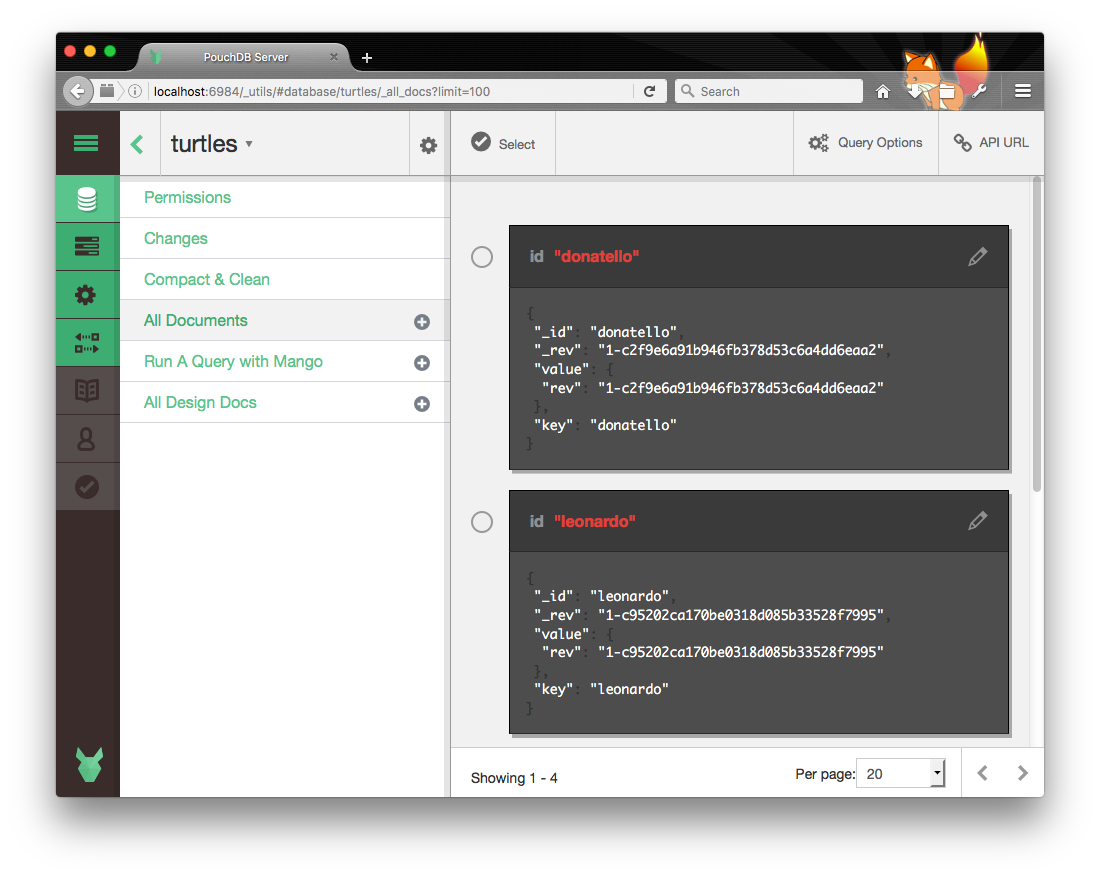
We have four documents in this database, which I've named turtles.
Next, we need to convert this data into a SQLite file. If we started PouchDB Server like so:
$ pouchdb-server --sqlite
Then we're already done. There will be a file called turtles in the directory where we ran PouchDB Server, which is already a SQLite file.
You can verify this for yourself by opening the file with the sqlite3 command:
$ sqlite3 turtles
SQLite version 3.8.10.2 2015-05-20 18:17:19
Enter ".help" for usage hints.
sqlite> .tables
attach-seq-store  by-sequence       local-store
attach-store      document-store    metadata-store
sqlite> select * from 'by-sequence';
1|{"name":"Donatello","weapon":"bo","bandana":"purple"}|0|donatello|1-c2f9e6a91b946fb378d53c6a4dd6eaa2
2|{"name":"Leonardo","weapon":"katana","bandana":"blue"}|0|leonardo|1-c95202ca170be0318d085b33528f7995
3|{"name":"Michelangelo","weapon":"nunchaku","bandana":"orange"}|0|michelangelo|1-52ebc5a2f8dbc0dc247cd87213e742d1
4|{"name":"Raphael","weapon":"sai","bandana":"red"}|0|raphael|1-77812e9da146bc18a37e51efb063dbac
However, if you're not using PouchDB Server with the --sqlite option, then we'll need to use a more generic approach, which
can copy any CouchDB or PouchDB database to a SQLite file.
So let's write a short Node script to do that:
// load PouchDB with the optional node-websql adapter
var PouchDB = require('pouchdb').plugin(require('pouchdb-adapter-node-websql'));

// set up our databases - make sure the URL is correct!
var inputDB = new PouchDB('http://localhost:5984/turtles');
var outputDB = new PouchDB('turtles.db', {adapter: 'websql'});

// replicate
inputDB.replicate.to(outputDB);
Let's call this script dump.js.
Now, if you haven't already, you'll need to install PouchDB and the pouchdb-adapter-node-websql plugin in the directory where we'll run the script:
$ npm install pouchdb
$ npm install pouchdb-adapter-node-websql
Next, we'll run our script using:
$ node dump.js
If this works, you will have a file called turtles.db in the directory where you ran the script. (We're adding the .db extension, which is not strictly necessary, but is a common convention for SQLite files.)
You can still inspect the database file using the sqlite3 command, as described above. Note that the tables
were built by PouchDB, though, and are not meant to be modified by hand.
Now we'll want to bundle the SQLite database file in our app. To do so, we'll use SQLite Plugin 2 and follow the instructions for creating prepopulated databases.
If you don't have it already, install the cordova tool:
$ npm install -g cordova
Then create a new Cordova project:
$ cordova create pouchdb-prebuilt-demo
Next, we'll want to copy the turtles.db into the www/ directory. This will ensure that the file
is bundled with the app.
PouchDB 5.x instructions: Before PouchDB 6, SQLite databases need to be
prefixed with _pouch_ in order to be located. So you would need to rename
turtles.db to _pouch_turtles.db. This is not necessary in PouchDB 6+.
At this point, we'll also need to install some plugins for our Cordova app. In particular, we'll need the File Plugin
and SQLite Plugin 2. Inside of the pouchdb-prebuilt-demo directory, run:
$ cordova plugin add cordova-plugin-file --save
$ cordova plugin add cordova-plugin-sqlite-2 --save
(For Ionic, you can also do ionic plugin add, and it will have the same effect.)
We'll also need PouchDB itself. For expediency, let's just download PouchDB
and include pouchdb.js in the app, under www/js. Then we'll add it to index.html:
<script src="js/pouchdb.js"></script>
Next, we'll need to write some code to copy the turtles.db file at runtime from the read-only www/ directory
to a read-write directory. This is the only cost we pay at startup when using this approach, but it allows us to
modify the database after it's been loaded.
So let's write a helper function to do this:
// copy a database file from www/ in the app directory to the data directory
function copyDatabaseFile(dbName) {
  var sourceFileName = cordova.file.applicationDirectory + 'www/' + dbName;
  var targetDirName = cordova.file.dataDirectory;
  // resolve the source and target filenames simultaneously
  return Promise.all([
    new Promise(function (resolve, reject) {
      resolveLocalFileSystemURL(sourceFileName, resolve, reject);
    }),
    new Promise(function (resolve, reject) {
      resolveLocalFileSystemURL(targetDirName, resolve, reject);
    })
  ]).then(function (files) {
    var sourceFile = files[0];
    var targetDir = files[1];
    // try to fetch the target file, to check if it exists
    return new Promise(function (resolve, reject) {
      targetDir.getFile(dbName, {}, resolve, reject);
    }).catch(function () {
      // target file doesn't exist already, so copy it
      return new Promise(function (resolve, reject) {
        sourceFile.copyTo(targetDir, dbName, resolve, reject);
      });
    });
  });
}
This uses the standard Cordova File APIs – such as getFile() and copyTo() – while adding Promises to make it a bit more easy to use. (Note that you will need a Promise shim if you are targeting older devices.)
It also checks whether the target file already exists, ensuring that the database is only ever copied once.
Next, we'll need to include a plugin, [pouchdb-adapter-cordova-sqlite(https://github.com/nolanlawson/pouchdb-adapter-cordova-sqlite)]. This plugin will allow us to use native SQLite rather than WebSQL (which doesn't support prebuilt databases).
To include this plugin, either npm install pouchdb-adapter-cordova-sqlite or directly download it, then link to it:
<script src="js/pouchdb.js"></script>
<script src="js/pouchdb.cordova-sqlite.js"></script>
PouchDB 5.x instructions: Before PouchDB 6, the WebSQL adapter would automatically fall back to SQLite if it detected it was running in a Cordova environment and the Cordova SQLite plugin was installed. This behavior was removed because it was difficult to maintain and configure.
Next, let's write the code to call this function and then print the contents of our preloaded PouchDB. Add this code to www/js/index.js, ensuring that it runs after the deviceready event:
copyDatabaseFile('turtles.db').then(function () {
  // using the Cordova SQLite plugin. Make sure this plugin is loaded correctly!
  var db = new PouchDB('turtles.db', {adapter: 'cordova-sqlite'});
  return db.allDocs({include_docs: true});
}).then(function (results) {
  var pre = document.createElement('pre');
  pre.innerHTML = JSON.stringify(results, null, '  ');
  document.body.appendChild(pre);
}).catch(console.log.bind(console));
Next, to run the app on Android, we can do:
$ cordova platform add android
$ cordova run android
Or on iOS:
$ cordova platform add ios
$ cordova run ios
If all goes well, you should see the following screens for Android and iOS:
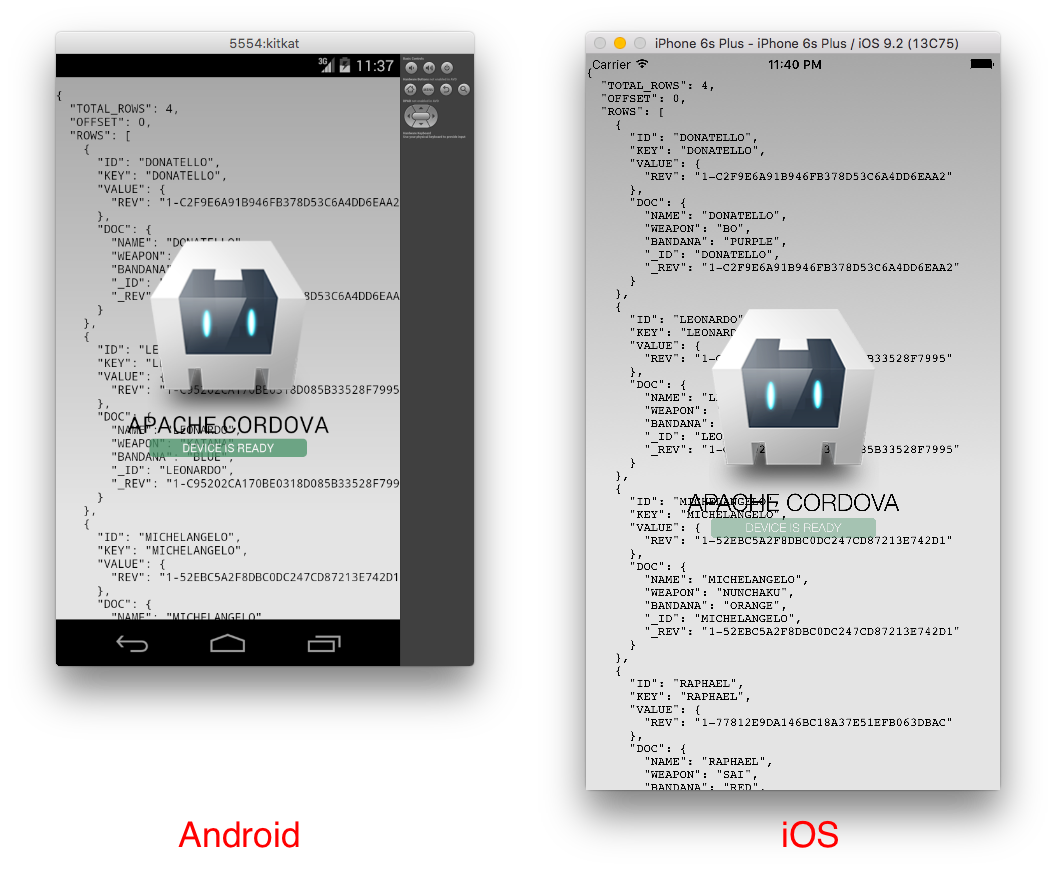
The text in the background indicates that the database was preloaded and ready to go!
The full source code for this example is available on Github.
On the web, we don't have the luxury of prebuilt SQLite files, because WebSQL isn't supported in every browser, and even those browsers that have WebSQL don't support prebuilt files.
However, we can dump any PouchDB or CouchDB to a "dump file" using pouchdb-dump-cli. This is less efficient than the prebuilt database (since PouchDB has to process the file and write the data to IndexedDB/WebSQL), but it gets the job done.
Going back to our "turtles" example, let's use pouchdb-dump to dump the contents
of the database to a plaintext dump file. First, install pouchdb-dump-cli:
$ npm install -g pouchdb-dump-cli
Then dump the database:
$ pouchdb-dump http://localhost:5984/turtles > turtles.txt
Now that we have a turtles.txt file, we can use the pouchdb-load
plugin to load it into our database.
Note: if you’d like to make this dump file even smaller, you can use short-revs
to shorten all of the revision strings to 1-A, 1-B, 2-A, etc. Be forewarned that this will
make it incompatible with the source database, though, so you won’t be able to replicate it back!
Assuming the dump file is hosted on our web site, we can then load it using db.load():
<pre id="display"></pre>
<script src="pouchdb.js"></script>
<script src="pouchdb.load.js"></script>
<script>
  var db = new PouchDB('turtles');
  // check a local document to see if we've already preloaded
  db.get('_local/preloaded').then(function (doc) {
  }).catch(function (err) {
    if (err.name !== 'not_found') {
      throw err;
    }
    // we got a 404, so the local document doesn't exist. so let's preload!
    return db.load('turtles.txt').then(function () {
      // create the local document to note that we've preloaded
      return db.put({_id: '_local/preloaded'});
    });
  }).then(function () {
    return db.allDocs({include_docs: true});
  }).then(function (res) {
    display.innerHTML = JSON.stringify(res, null, '  ');
  }).catch(console.log.bind(console));
</script>
This will fetch the turtles.txt file via AJAX and then load it into PouchDB. A special _local document
lets us know if we've already loaded it, which means we can skip this step on subsequent views.
If this works, you should see the four turtle documents printed to the screen, since they were successfully loaded from the dump file.
The full source code for this example is available in this Gist. And here’s a live version.
Prebuilding a database can be a nice way to speed up the initial load of your app or web site. However, it is an optimization, so it takes a little bit of extra work to get it up and running.
For the average use case, if you can avoid any complicated prebuild steps and simply
replicate between CouchDB and PouchDB via the normal replicate() and sync() APIs,
you should. In fact, CouchDB's replication is slated to speed up dramatically
with v2.0 and v1.7, thanks to the new _bulk_get endpoint.
When _bulk_get lands, you may find that pouchdb-load isn't significantly
more performant than just replicating directly from CouchDB. (Prebuilt SQLite files, however, are likely
to remain much more performant.) Also note that PouchDB's replicator will automatically switch to the
faster algorithm if it detects that the server supports _bulk_get.
Hopefully this tutorial was useful for anybody struggling to get preloaded PouchDB databases into their app. If not, feel free to get in touch anytime!


